Difference between revisions of "Binari"
| (3 intermediate revisions by 2 users not shown) | |||
| Line 52: | Line 52: | ||
*Do not use our classical belts, use industrial/automotive belts instead | *Do not use our classical belts, use industrial/automotive belts instead | ||
**Opinionated Note: Perhaps putting the belts directly onto the motor is not best practice... utilizing the shaft to attach a small pulley would allow for both timing belt usage and advantageous gear ratios. At the very least, do not place belts directly on grooved motor housings-make sure the can is smooth. | **Opinionated Note: Perhaps putting the belts directly onto the motor is not best practice... utilizing the shaft to attach a small pulley would allow for both timing belt usage and advantageous gear ratios. At the very least, do not place belts directly on grooved motor housings-make sure the can is smooth. | ||
| + | *For under/over cutters, ensure that your weapon is constrained vertically so that if it is flipped, the weapon-shaft combination doesn't fall onto the top/bottom plate and rub against it | ||
| + | **Alternatively, make room between the weapon and the top/bottom plate for a needle thrust roller bearing | ||
*Look for better protection for belts/weapon stacks (testing materials/more research) | *Look for better protection for belts/weapon stacks (testing materials/more research) | ||
*AR500 is sorta hard to machine (we need to basically increase the waterjet thickness, machinability, and possibly do 2 passes) | *AR500 is sorta hard to machine (we need to basically increase the waterjet thickness, machinability, and possibly do 2 passes) | ||
| + | *A positive was that the weapon shafts displayed no significant bending or deformation after competition on inspection. Shafts were 3/4" Diameter 1144 Carbon Steel shafts with a yield strength of 100,000psi. May be used as a reference for future calculations. McMaster link here: https://www.mcmaster.com/6101N55/ | ||
===Weapon Stack and Weapon Pictures=== | ===Weapon Stack and Weapon Pictures=== | ||
| Line 155: | Line 158: | ||
* To expand on this, designs with modularity have a lot of merit. If the shuffle shaft/plates get damaged for example, being able to replace the whole shuffle module will be very helpful. | * To expand on this, designs with modularity have a lot of merit. If the shuffle shaft/plates get damaged for example, being able to replace the whole shuffle module will be very helpful. | ||
* Avoid locking things that need servicing into the bot. You don't want to have to remove multiple plates to access 1 thing. | * Avoid locking things that need servicing into the bot. You don't want to have to remove multiple plates to access 1 thing. | ||
| − | + | ==== Related Files ==== | |
| + | * Bill of Materials: https://docs.google.com/spreadsheets/d/1Z-RYOTp5Wkwx8Lf1MlFdWmMpdz6BR6DFc4hk9f5zwyg/edit?usp=sharing | ||
[[Category: BattleBots]] | [[Category: BattleBots]] | ||
[[Category: FeatherWeights]] | [[Category: FeatherWeights]] | ||
[[Category: BigBots]] | [[Category: BigBots]] | ||
Latest revision as of 03:45, 28 December 2022
Contents
Introduction
As you may know, we in Robojackets have a few rules that are strictly enforced: use safe shop practices, all robots name must end in "i", and NO WEDGES (no exceptions). After all, the weapon system is what makes a battlebot fun to design, build and watch. This being the case, 2 (two) weapons should be even better...Right? And so the motivation for this bot was to create a 2 weapon battlebot, specifically a double horizontal spinner. This would function as sort of a test bed to 1. evaluate the feasibility of employing 2 weapon systems in this weight class and 2. determine how effective a second weapon would be in combat.
Members:
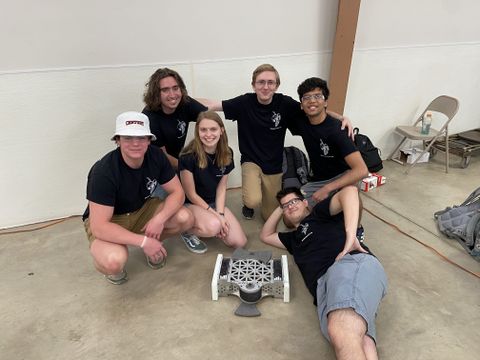
- George 'Knute' Broady (Lead)
- Paul Matesevac
- Lucy Bricker
- James Peavy
- Joe Irwin
- Mannan Goel
Drive System
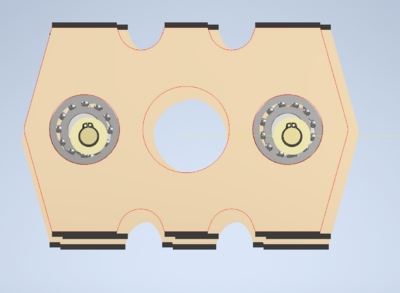
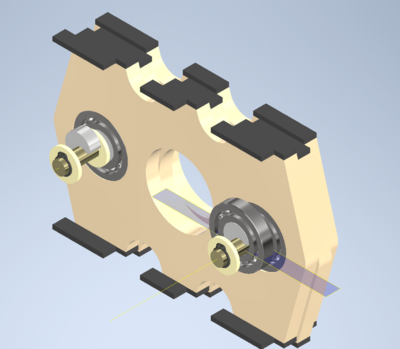
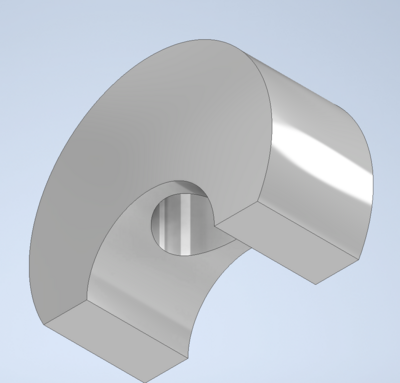
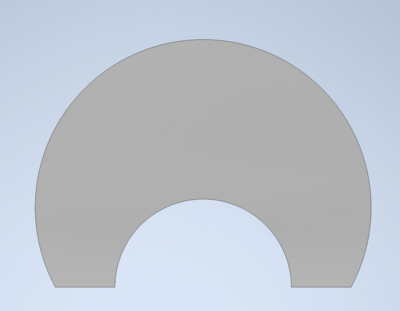
We decided to employ a shuffler drive system in order to take advantage of the 50% weight bonus granted by most (not all) competitions. This would allow us to make a double horizontal without gimping the weapons too much. The shuffler was a 4 foot assembly with holes drilled at 90 degree rotations along the length of the shafts. These holes would accept dowels which would then hold the semicircular cams. All of this would rotate inside ball bearings in the shuffle feet. Further, the feet were made taller than the chassis in order to allow for invertibility.
Notes and Lessons:
- This system requires pretty careful machining and assembly. Misalignment and burs will cause jamming. Our problems were exacerbated by excessive waterjet taper on the cams, which can be partially resolved by reducing the machine-ability settings in the jet and then filing to fit.
- Ensure there is a collet for your shaft size and a machinists jack, as DIY solutions lead to inconsistencies.
- Provide ample protection for the shuffle system in your design. This drive system, while it can be as effective as wheels, is not as robust. Bent shafts, shifted plates, loose bearings can cause it all to fall apart and render you immobile after a big hit.
- consider designing the shuffler as modules, which can be swapped between matches. We made the mistake of basically locking the shufflers in with the rest our our chassis and essentially had to take the whole bot apart to unbend the drive shafts after a fight.
Foot Profile
Cams and Bearings
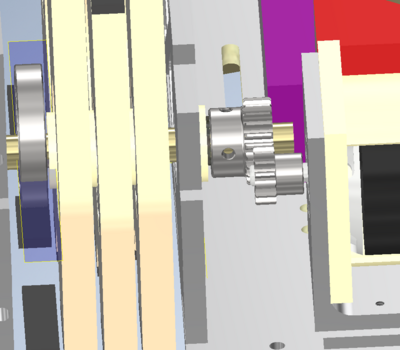
Drive Gears
Weapon System
Design Considerations
Because we had 2 weapons, it was important to have them be light enough as to not surpass a combined weight of ~15 lbs. The extra weight bonus from the shuffler allowed for this to be much more feasible (also required because we have 2x the weapon motors).
Weapon Design
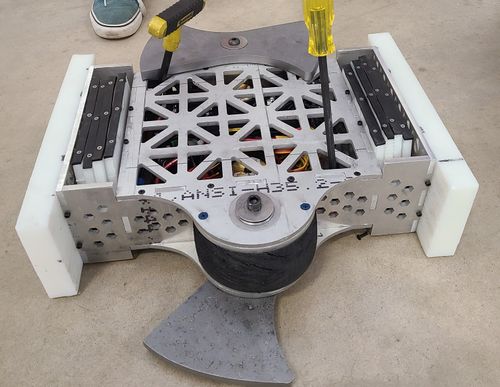
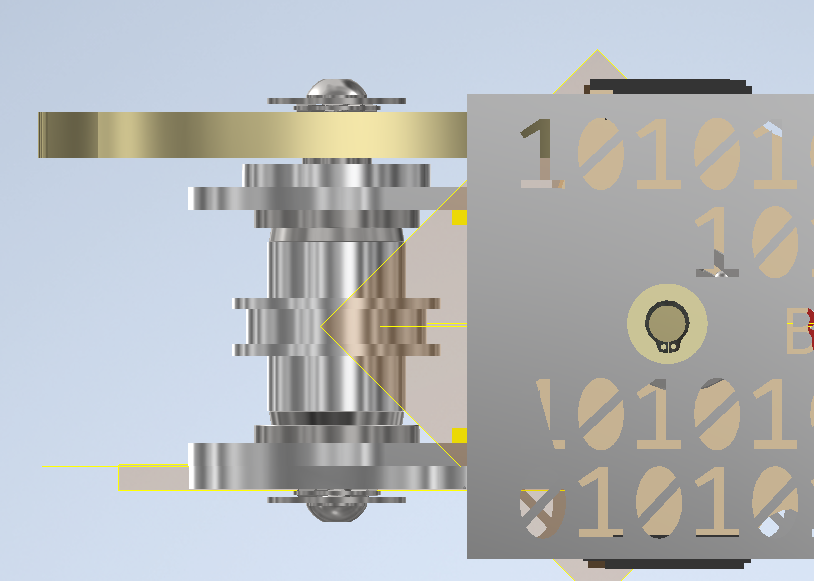
Overall Design: Made to resemble Valkyri's overall weapon stack, minor changes were made to the overall design, A roller bearing (in design) was not needed at the bottom because of the constraint on the shaft itself (enough distance to spin without touching the bottom plate). This did not work, therefore a needle roller bearing should always be strongly considered in future live-shaft designs despite clearance looking good enough.
Weapon: Our weapons were waterjet out of AR500 steel (made from sheets of gun target steel). Each weapon was 0.5 inches in thickness and 11 inches in diameter. The overall shape was intended to put as much mass at the hitting ends as possible, there was no need to save weight therefore we were able to have a solid weapon. There was added structural support around the location that met with our weapon shaft, this was to theoretically prevent any snapping of the weapon (fears due to Apachi's weapon failure). Additionally, the weapon's geometry was made in order to ensure that at the maximum distance, only 1 point has the possibility of hitting (in order to reduce the chance of us 'skimming' the other bot instead of properly hitting it).
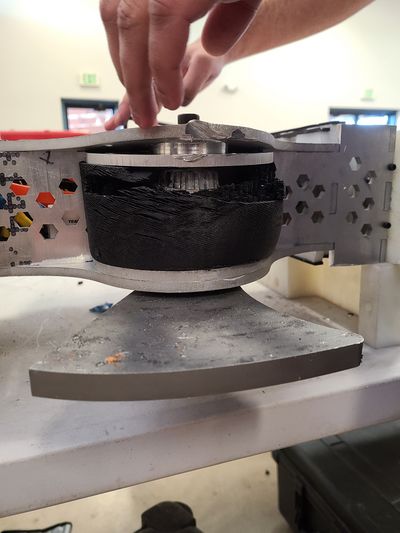
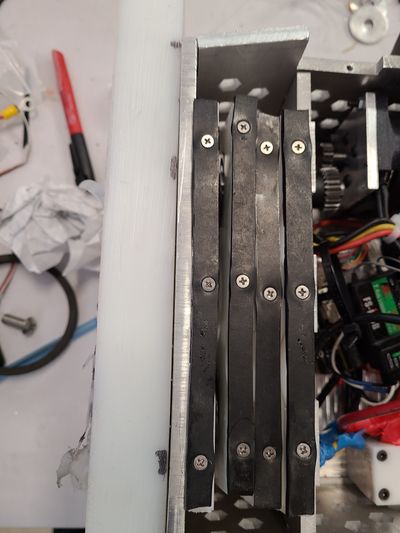
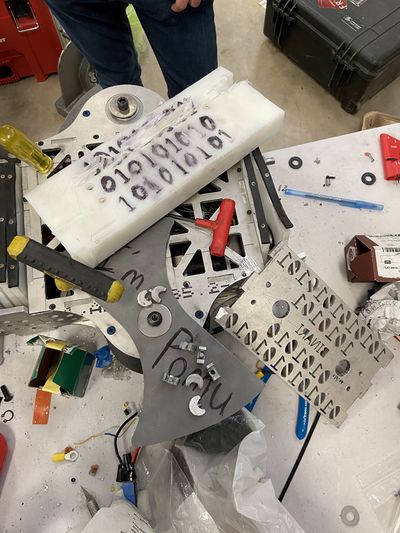
Belt Protection: Carbon fiber reinforced nylon material called Onyx, printed on a Markforged 3D printer. The print was not the best, therefore our belt protection was pretty non-existent. Also, the material may not have been a good choice, as carbon fiber doesn't resist instantaneous hits very well.
Lessons:
- Do not use our classical belts, use industrial/automotive belts instead
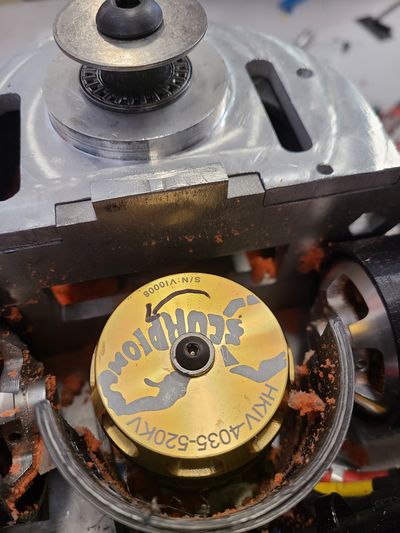
- Opinionated Note: Perhaps putting the belts directly onto the motor is not best practice... utilizing the shaft to attach a small pulley would allow for both timing belt usage and advantageous gear ratios. At the very least, do not place belts directly on grooved motor housings-make sure the can is smooth.
- For under/over cutters, ensure that your weapon is constrained vertically so that if it is flipped, the weapon-shaft combination doesn't fall onto the top/bottom plate and rub against it
- Alternatively, make room between the weapon and the top/bottom plate for a needle thrust roller bearing
- Look for better protection for belts/weapon stacks (testing materials/more research)
- AR500 is sorta hard to machine (we need to basically increase the waterjet thickness, machinability, and possibly do 2 passes)
- A positive was that the weapon shafts displayed no significant bending or deformation after competition on inspection. Shafts were 3/4" Diameter 1144 Carbon Steel shafts with a yield strength of 100,000psi. May be used as a reference for future calculations. McMaster link here: https://www.mcmaster.com/6101N55/
Weapon Stack and Weapon Pictures
Chassis System
- The chassis is composed almost entirely of .25" 6061 Aluminum
- It was made with the robojackets standard puzzle fitting plates method
- shufflers were mounted between inner and out side plates
- front and back plates spanned all the way across the bot.
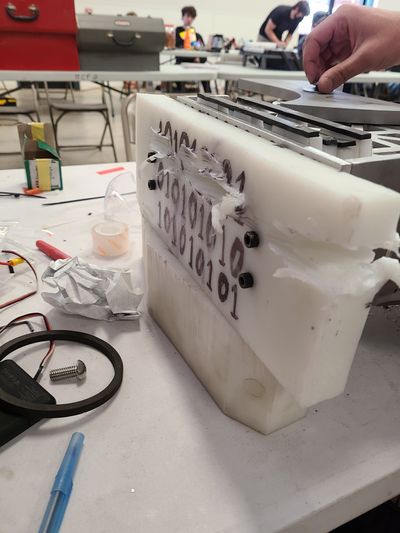
- Large blocks of HDPE were added last minute to the sides to prevent direct hits to shuffle shafts
Lessons and Notes:
- Aluminum should only be used as a skeleton for a battlebot. 6061 is not sufficient to take hits at the 30lb level- armor should really be Titanium or AR500 steel.
- The puzzle fit method is perfectly fine for meshing plates together however the rectangular prism geometry is dated and vulnerable.
- consider geometries better suited to deflecting hits or limiting the impact of eventual deformation from combat
Electronics
| Drive Motors | Turnigy Aerodrive SK3 - 5055-280KV Brushless Outrunner Motor
|
| Drive Motor Controllers | Mini FSESC4.20 50A base on VESC® 4.12 with Aluminum Anodized Heat Sink |
| Weapon Motor | Scorpion HKIV-4035-520KV |
| Weapon Motor Controllers | YEP 100A (2~6S) SBEC Brushless Speed Controller |
| Receiver | FlySky FS-iA6B |
| Transmitter | FlySky FS-i6X |
| Battery | Lectron Pro 22.2V 6500mAh 100C Lipo Battery |
In broad overview, our electronics system was as follows. It was originally meant to include four LiPo batteries, but this was scrapped within the last two weeks of competition in favor of one single 22.2V 6500mAh 100C LiPo. Connections were made via Wet Noodle wire, XT60 clips, and screw terminals. Electricity flows from the battery into one terminal of the Team Whyachi switch. The other terminal receives the connections from all the positive ends of each piece of electronic equipment in the bot (the ESCs, which are connected to the motors via bullet connectors). All negative paths go to ground.
Despite past lessons, electronics were a struggle on this bot. One main issue is that when an ESC says "Reversible" this does not necessarily mean that it has a bidirectional mode, which is needed for drive motors. Rather, it may mean that it can be set to reverse the output without removing any wires (not very useful for us). For example, YEP 100 A ESC are NOT reversible, and Red Brick 100 A esc are also NOT reversible. From our understanding, using am ESC that supports BLHeli or VESC firmware guarantees that it is able to function in bidirectional mode.
There was also a bit of a concern for our original plan to use multiple batteries in parallel. From other experienced builders, this was later found not to be a large issue. However, it makes wiring and other elements more difficult.
The current draw calculations for the shufflers from the Apachi spreadsheet do not seem accurate. Both Chonkii and Binari require much less power than that sheet would suggest. It is still very difficult to know how much capacity and current is needed for a shuffler system without testing.
The weapon motors and ESCs seemed to function well, however the belts snapping preventing and substantial use. As mentioned above, automotive timing belts should be used in the future.
IMPORTANT LESSON (and what should be M.O. of the club):
- Do not leave electronics to the end of the year. Make wooden mockups of the bot at the very beginning of the year so that wiring can be measured and soldering done. This mockup could even be driven. This is another opinion: chassis is less important than the ability to have consistently performing drive and weapon systems, which should be perfected year-to-year and driver control can be optimized.
Competitions
AVC 2022
- Results: 0-2
- Bracket Style: Double Elimination
- [Binari (loser) V.S. Crippling Depression (winner): https://youtu.be/npJXu5YIfbU]
- Crippling Depression was a wedge and undercutter combination bot.
- As an undercutter, the weapon went underneath ours, slightly sheared one of our bolts
- After getting flipped, they absolutely destroyed the weapon guards and side armor and bent our shuffler system and front plate
- Lost via tap-out
- [Binari (loser) V.S. HUHMWPE DUHMWPE (winner): https://youtu.be/zIZz2qR4AVM]
- Ripped off sideplate, and the shuffler system slowly fell apart
- Lost via tap-out
- More Description
- [Binari (loser) V.S. Crippling Depression (winner): https://youtu.be/npJXu5YIfbU]
- Bracket Style: Double Elimination
Issues
- One of the largest problems we encountered this year was the ridiculous amount of taper from the waterjet. Even with designing for added tolerance, plates did not fit together and holes were too small resulting in a lot of time spent re-machining. This probably isn't going away any time soon since it is doubtful the SCC will shell out the money for a new one so it is good to be aware of this and even to perform test cuts to evaluate how your part might end up.
- We added pulley guards to our bot with the intention of, well, guarding the pulley. These were 3-D printed in the AE makerspace on a markforged printed out of the carbon fiber reinforced nylon material onyx. This was not the super material we were led to believe it was. Frankly, it sucked. The prints we ended up using experienced bed adhesion issues during print but due to time constraints (late redesign, long time to get someone to print it in AE space) we had to go with them. The infill resembled stacks of pellets. This may or may not be a result of the bed adhesion issues but it was shredded immediately. These ended up being more trouble then they were worth so alternative methods of keeping pulleys safe should be considered.
- Independent of the pulley guards getting shredded, the belts were shredded as well. As it turns out, the polyurethane belts do not hold up, especially when placed directly on a ridged scorpion motor can. Consider using high strength belts such as those with cords inside.
- Considerations for armor were not made initially resulting in large HDPE blacks being bolted to the side last minute. When these blocks took a direct hit to the front the shifted an entire side of the bot, bending the front plate and one of the drive shafts and knocking bearings out of place. I can't stress this enough; have a plan for your armor.
- 1/4" 6061 Aluminum did not end up being as resilient as previously thought. Once the HDPE blocks were ripped off, the side plates soon followed nd large deformations were observed after fights. So make sure your properly defend your bot.
- Someone, preferably everyone needs to learn how ESCs work. We bought "reversible" ESCs for our drive since, in previous years, I've been on teams which have made the mistake of not getting reversible ones resulting in only 1 drive direction. But apparently "reversible" doesn't necessarily mean the ESC can drive both directions???????? Upon finding this out, (again late) we scrounged Hocki's ESCs but they were painfully slow and we would've needed to do some Arduino garbage to try and fix that which no one was qualified to do. So we replaced those with red bricks chonkii had selected for their drive but turns out those weren't reversible either. Luckily everyone at AVC is way nicer than they need to be and several people brought ESCs for us day 2 and someone sat there and programmed them for us. These situations need to be avoided.
Changes to make
- Put pulley over motor can or use flat can motor
- Apply more deliberate shuffler protection. This may involve a full chassis redesign, including a plan for armoring the bot.
- Use functional motor ESC combinations and spec batteries properly.
- If possible, lower bot. The over cutter was useless in both matches since both opponents were fully beneath it. When crippling depression was flipped though, its under-then-over cutter was perfectly positioned to tear through out pulley guards and rip apart our weapon stack up.
- Use standard size bearings and belts and design around these as this will allow for ordering plenty of spares.
- Speaking of spares, make them. Re-bending plates back into place isn't fun. Instead it's better to be able to hot swap between matches.
- To expand on this, designs with modularity have a lot of merit. If the shuffle shaft/plates get damaged for example, being able to replace the whole shuffle module will be very helpful.
- Avoid locking things that need servicing into the bot. You don't want to have to remove multiple plates to access 1 thing.
