Valkyri Design Guide
Contents
Introduction
Valkyri is a 30lb undercutting horizontal spinner developed during the 2019-20 season for the Robobrawl competition. It was meant to implement innovative features for Battlebots such as magnets and a direct drive system but was never able to compete.
Team Members:
Bot lead: Nikolay Tranakiev
Judea Britt
Celina Huang
Grace Khan
Hoyean Le
Paul Matesevac
Tyler Mesa
Keaton Sadoski
Bot Friend: Carrie Wehmeyer
Design Basics
Chassis
Overview
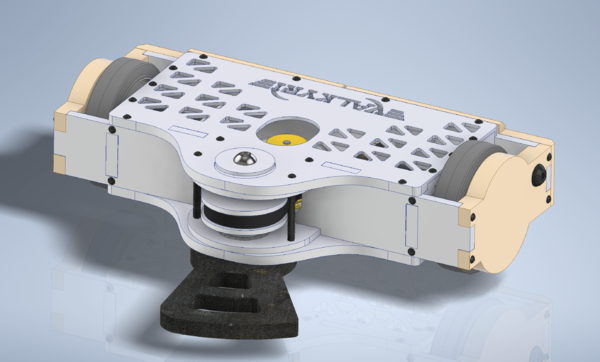
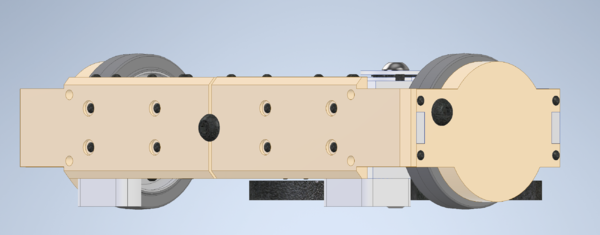
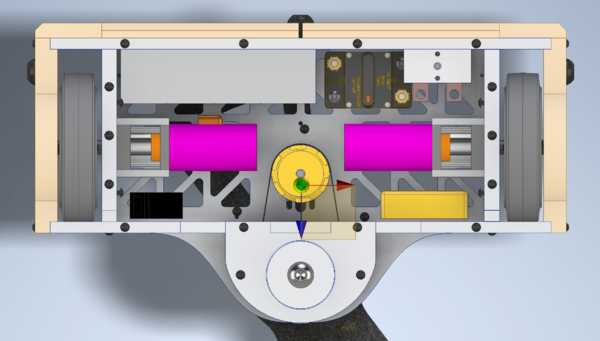
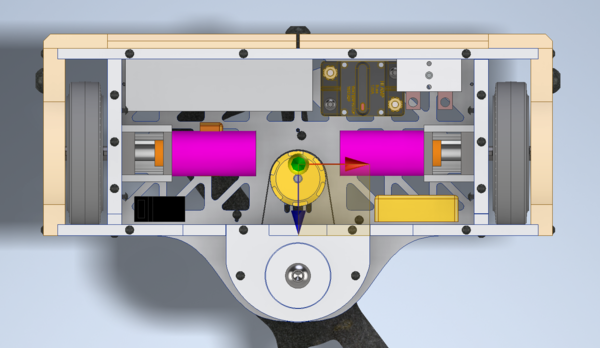
Valkyri’s chassi consisted of 8 components: top and bottom plates, right and left inner side plates, front and back plates and weapon mounting plates.
Design Decisions
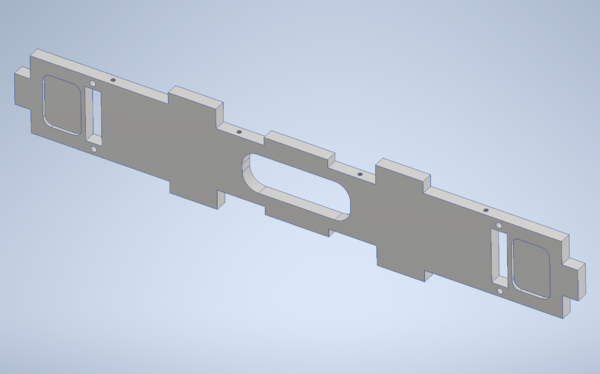
Front Plate (.375”): The front plate puzzle fit into the side, top and bottom plates. In order to move the weapon closer to the body and have the correct pulley ratio, it overlapped slightly with the front plate and required a large cutout. This made disassembly more difficult but did not cause issues during brief testing. The plate extended beyond the sides of the top and bottom plates and puzzle fit with the side armor. Two pockets were also added so that the wheels could be moved further forward and closer to the center of gravity without rubbing on the plate. Machining was mostly straight forward but the plate was too long to be able to machine the holes for the side armor on the mill so a custom jig was waterjet and the holes were hand drilled.
Back Plate (.375”): The back plate was similar to the front plate but it lacked puzzle fits into the top and bottom plates and a hole for the pulley. It had additional tapped holes for attaching the back armor and on the inside for attaching the switch. It also required hand drilling for the side armor mounting holes similar to the front plate.
Side Plates: (0.5”) The side plates were made slightly thicker since they were the attachment point of the drive motors and therefore held the weight of the bot. They also included more cutouts to save weight. The motor pocket was initially circular with a rectangular portion for wire management since the brushless motors were attached directly to the plate. The shallowness of this pocket may have contributed to the wiring issues on the second iteration of the drive (See drive section). The second iteration of the side plates (for the third iteration drive) had a large rectangular pocket to fit the gearbox mounting plates.
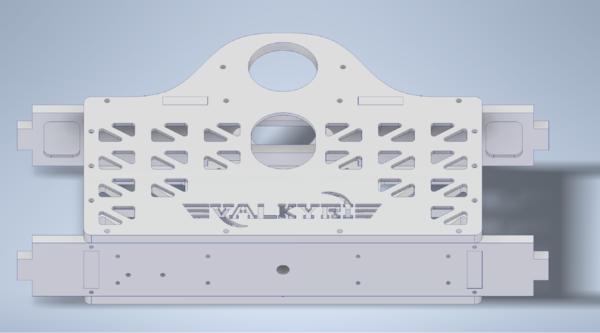
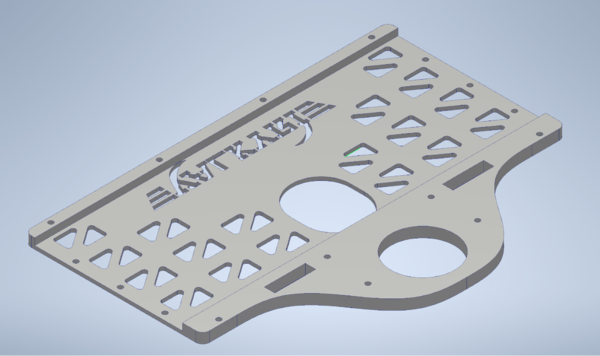
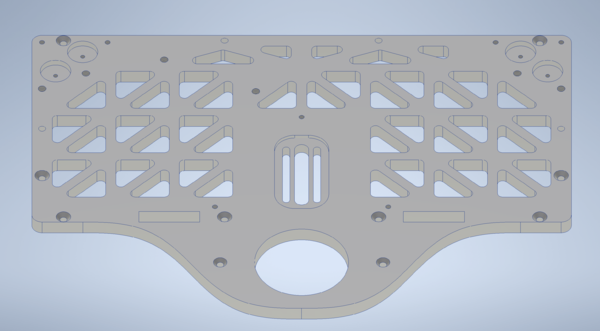
Top Plate (.0375”): The top plate was made of ⅜ aluminum since it was the upper attachment point of the weapon but the central part behind the front plate was milled to .125” to save weight and since it was assumed there would be no significant forces acting on the top of the robot. Most of the structural rigidity came from the front, back and side plates.
Bottom Plate: (0.375”) The bottom plate was the heaviest part of the chassis. It was ⅜” over its entire area. It was also the attachment point closest to the weapon and therefore assumed to take the most force. There were 4 pockets in the back corners as seats for the magnets. Several of the screws on the bottom plate were countersunk so that they would not be hit by the weapon as it spun. Since the weapon motor needed to be moved to tighten the belt and therefore countersunk screws could not be used, a large slot pocket was created at the mounting slots to ensure they would not be struck by the weapon.
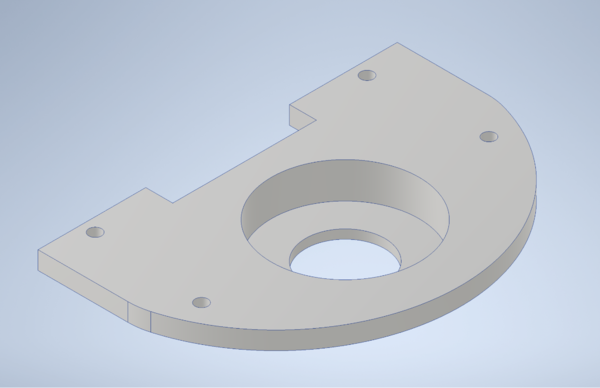
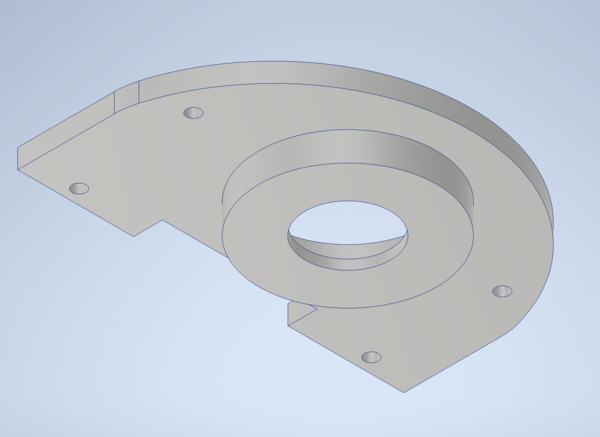
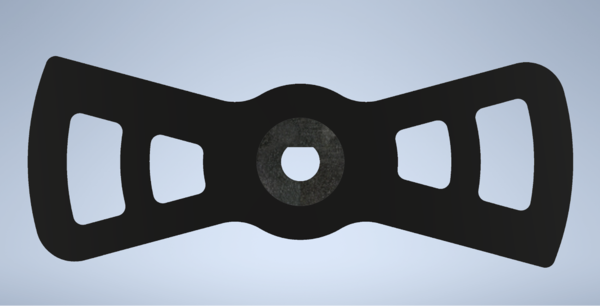
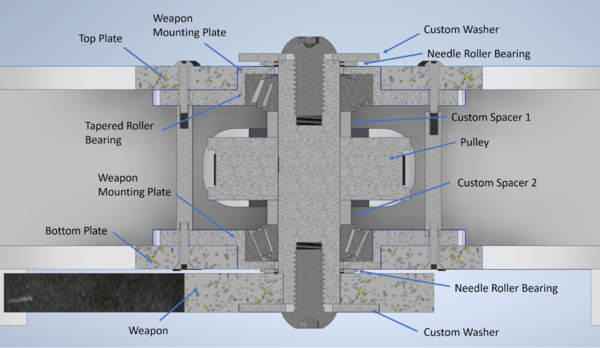
Weapon mounting Plates (.625”): Originally the weapon bearings were meant to press fit into the bottom and top plates. However, tapered roller bearings for the 1” shaft were too thick and would have required at least a .625” thick bottom and top plate which would have weighed too much. Another option considered was using .625” bottom and top plates and then milling the back portion to .375 but that was deemed as too difficult of an operation with too much material being removed.
The weapon mounting plates fixed these problems by being a separate part in which the bearings fit which then puzzle fit into the bottom and front plates. The bearing was press fit into the plate and the plate was a relatively loose fit into the bottom plate so that it could be removed and disassembled. The plate was in total .625” thick but .75” stock was used to allow for better work holding. The outline and center hole of the part was waterjet and the rest was completed on two operations with the HAAS. 7075 Aluminum was used since there was available stock and machining was not significantly more difficult since it was CNCed anyway.
Armor
Overview
Valkyri’s armor consisted of 4 HDPE components: two .75” side plates, and two .5” back plates.
Design Decisions
The primary objective or the armor was to prevent direct damage to the chassis. The back armor was fairly thin and divided into two pieces so that it would be easier to replace when damaged. The side armor featured a slightly rounded profile in order to provide some protection to the wheels in the case of being against another undercutter. Large ½-20 button screws were placed in the middle of the armor pieces (one on each side and one on the back). This was done in order to make the possibility of the bot landing on its side less likely although the effectiveness of this design choice was never tested.
Drive
Overview
The drive of Valkyri was probably the most problematic part of the entire bot. Several iterations were attempted and it never achieved full operation
Design Decisions
Iteration 1: (Designed) Initially, during design over the summer, we decided to try using a 24V brushed motor. The benefits of using a brushed motor were: better interfacing with Banebot gearboxes, theoretically more resistant to forces and collisions, and they had more torque at low rpm. After the first design review, this design was abandoned since there were issues with finding a compatible ESC and they were significantly heavier than equally powerful brushless motors.
Motor: http://www.banebots.com/product/M7-RS775-24.html ESC: https://www.vexrobotics.com/217-8080.html
Iteration 2: (Designed and Built)
The second iteration aimed to eliminate much of the gearbox altogether. Very high torque brushless motors were found from alienpowersystem.com. The motors had a very low kv (160) and were originally designed for making powered skateboards. These motors were physically much larger in diameter than the equivalent gearbox motor combination but the total weight was determined to be about the same. Removing the gearbox was meant to be more reliable since it removes a point of failure and removes possible issues with the transmission of power between the motor and gearbox. Scorpion ESCs were chosen due to their numerous features, theoretically more stable software and support, and the fact that a 40% discount was available for robojackets at the time.
The motors mounted directly to the side plates but the original shaft of the motor was not long enough to be able to reach the desired location of the wheels. To fix this, the original shaft was replaced with a custom longer shaft. This was a relatively straightforward process and simply required removing the rotor of the motor and heating the set screw holding the shaft so that it could be removed. The motors used 8mm shafts which were slightly smaller than the usual .5” for this weight category but it was deemed to be enough for most cases.
The entire drive system for this iteration was built but it did not run. After diagnosing problems with the ESC it was found that the motors had one of their wires disconnected from the coils so it could not spin continuously but only stutter. An attempt was made to fix the disconnected wire and while it did work initially, after a few seconds the wire broke again on the test bench so any attempts at repair were deemed futile since the motors would likely not be able to withstand the stresses of competition.
Furthermore, the scorpion ESCs were unable of bidirectional mode so they could not be used without sketchy modifications.
Motor: https://alienpowersystem.com/shop/brushless-motors/50mm/aps-5065-outrunner-brushless-motor-60kv-1800w/ ESC: https://www.scorpionsystem.com/catalog/speed_controllers/6s_tribunus_sbec/06_80/ Gearbox: none
Notes: One of the motor rotors became demagnetized after being left on the stator with no shaft to prevent it from making contact for a long period of time and could no longer be used.
Iteration 3: (Stole Design and half Built) About a month before competition (before it had been cancelled) we realized iteration 2 was not going to work for competition so we improvised. The motors and ESCs were taken from Cassowarri, a 60lb undercutter that was not going to be used in the current year. When fully constructed Valkyri was almost 3lbs underweight so the additional weight of the gearboxes and larger motors was acceptable. To fit the ESCs, their heatsinks and fans needed to be removed. Since the motors and ESCs were meant to power a much larger bot, it was assumed they would not operate at their maximum current and therefore the fan is not required, but this theory was never tested. The original gearboxes of Cassowarri were too long and caused the motors to interfere with the weapon motor so they were reduced to spare 26:1 gearboxes that were found and calculated to still have enough torque.
Motor: https://hobbyking.com/en_us/turnigy-xk-4074-2000kv-brushless-inrunner.html ESC: https://hobbyking.com/en_us/hobbykingr-tm-x-car-beast-series-esc-1-8-scale-120a.html Gearbox: http://www.banebots.com/product/P61S-55.html
Calculations
test
- Notes/Helpful Advice
- Find an ESC with bidirectional or reversable mode. Most airplane and quadcopter ESCs have a throttle range between 0 to max in only one direction. In bidirectional, middle throttle is 0 and you can go into negative and positive max (meaning spin in both directions). Car ESCs are more likely to have this feature but you might get lucky with other ones too.
Weapon
Overview
Valkyri used a single large horizontal spinning weapon mounted .25” from the ground. Its primary intention was to strike opposing bots below their defenses and while also being larger and more powerful than most other bots.
Design Decisions
Weapon: Valkyri’s weapon was a two toothed plate 14 inches in diameter and machined out of a single block of steel. The shape was chosen over more experimental designs since it was a good balance of high moment of inertia and strength. It has thick supports on the hitting edge but a large amount of the mass is also positioned far from the center of rotation with concentric arches. It was spun by the weapon shaft and a D slot. A 1/16” pocket was milled on the bottom in order to fit a washer that held the weapon to the shaft and prevented it from falling off. It was originally meant to be made of S7 tool steel but due to problems with the order, it was instead made of P6 low carbon mold steel. The effects of this material choice are not known since it was never tested in competition.
Assembly:
Weapon Shaft:
The weapon shaft was 1 inch in diameter and made of steel. A 1 inch diameter was chosen since It had a D profile on the bottom section to connect to the weapon and two ½” screws on the top and bottom to hold the assembly together. The pulley was mounted to the shaft with a key and a set screw. The key slot and set screw slot were machined on a mill using a collet block to ensure that they were at 90° of each other.
Tapered Roller Bearings: The roller bearings were chosen based on the diameter of the shaft and the rated max rpm. Tapered roller bearings were chosen since they support the shaft in the axial direction rather than just shear. Most bearings of this size that had documented specifications were capable of withstanding the theoretical maximum speed of the weapon (8000 rpm). The thinnest bearing available for this shaft size was chosen since that was the most limiting dimension of the design. Some bearings had ratings for the max amount of force they could withstand but they were not considered since there was no way to reliably calculate the forces created during competition.
Washers: Washers were waterjet out of 1/16” aluminum since there was not a source that sold the correct size capable of fitting the ½” screw snugly while also being wide enough to work with the needle roller bearings or weapon pocket.
Spacers: Two spacers were used to position the pulley at the correct height of the front plate slot and the weapon motor. They also helped provide axial support for the pulley. They were two simple aluminum rings of different sizes that fit loosely on the shaft. Also one was lost somewhere in the electronics room and never found…
Calculations
test
- Notes/Helpful Advice
- test
Magnets
Overview
Two wheeled bots are at a disadvantage since at least some of the weight of the bot would rest on a skid. This creates additional friction while moving as well as reducing the normal force on the wheels leading a lower max torque before the wheels start skidding and a lower pushing force. The more weight that rests on the skid, the more their effects are augmented. Two wheeled horizontal spinners are very prone to this effect since the center of gravity is shifted forward due to the heavy weapon while the wheels tend to be further back on the body. The ideal situation would be to have the center of gravity be aligned with the axles of the wheels. This can be achieved by moving the center of gravity back by adding more weight behind the wheels or moving the center of the wheels forward. To mitigate this effect in Valkyri, first, the wheels were moved as far forward as possible. However even then the center of gravity was still closer to the skid on the weapon than the wheels since much of the weight of the bot was located at the weapon. To move the center of gravity further back, magnets were added to the back edge of the body. The magnets add the equivalent of 10lbs to the back of the bot. This pushes the CG almost to the axles. (If the CG went behind the wheel axis the robot would tip backwards) Additionally, the magnets increased the equivalent weight of the bot to 40lb and made the normal force on the wheels greater than any other 30lb bot without magnets allowing us to push any other bot in the class (Assuming equal coefficient of friction).
The magnets rested in pockets in the bottom plate. 12 .75” diameter .25” height neodymium magnets were used in 4 stacks of 3. A plastic guard was created and mounted to the bottom plate to further hold the magnets since the single hole standard in the magnets was deemed too weak to support them. Furthermore, the plastic mount would protect the magnets in case the bot tipped backwards and would be the first to hit the ground rather than the relatively brittle magnets.
- Notes/Helpful Advice
- Make sure to check that the competition the bot will be used at will have a metal floor.
Robowrestling is a good source on using and calculating magnets since many of their bots use similar magnets in competition.
