3lb Beginner's Guide
Contents
Introduction
- these
- are
- place holders
Choosing a Robot
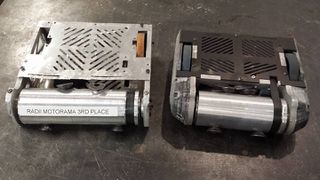
Drum Spinner
This weapon is a spinning drum with teeth at the front of the robot. It is driven similarly to a vertical or horizontal spinner with a pulley system between the weapon and weapon motor.
Pros
- Great beginner bot
- Reliable due to simple weapon
- Outputs good damage
- Weapon doesn't require too much space away from the rest of the bot
- Easy to design so it can drive while flipped
Cons
- Smaller strike zone
- Gyroscopic effect can make fast turns hard
- Large heavy weapon
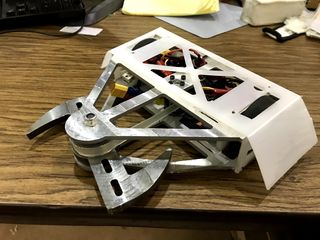
Horizontal Spinner
The weapon is a flat spinning bar or disk at the front of the robot. It is also driven similarly to a drum or vertical spinner with a pulley system between the weapon and weapon motor.
Pros
- High Damage Output
- Large strike zone
- Easy to design so it can drive while flipped
- Weapon can withstand significant damage without breaking (bent weapon still functions well)
Cons
- Robot must extend out to avoid its own weapon
- Gyroscopic effect make turning fairly difficult
- Needs a lot of structural support on the weapon to prevent damage from recoil
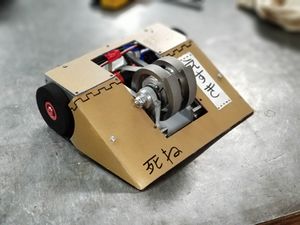
Vertical Spinner
This weapon is a spinning ring with teeth that surrounds the entire frame. Generally, the ring is supported by "rollers" which have bearings to reduce friction and support the ring with a male-female interface. The ring is typically driven directly by the weapon motor which has a casing of a high friction material such as rubber.
Pros
- Great damage output
- Allows for the use of a wedge, which acts to as armor and directs bots into the weapon
- If the weapon breaks, it still functions as a wedge bot
Cons
- Hard to allow for driving when flipped
- Gyroscopic effect can make driving difficult
- Weapon has to be smaller to maintain low center of gravity (keep the bot short)
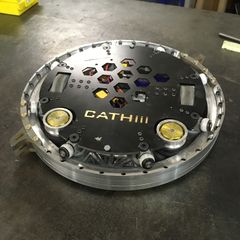
Ring Spinner
This weapon is a spinning ring with teeth that surround the entire frame. Generally, the ring is supported by "rollers" which have bearings to reduce friction and support the ring with a male-female interface. The ring is typically driven directly by the weapon motor which has a casing of a high friction material such as rubber.
Pros
- Perfect 360 strike zone
- Hard to compete against
- Easy to design so that you can drive while flipped
Cons
- Difficult to design and assemble
- Weapon takes all the blows and can break
- Can be difficult to drive
Wedge
It's a wedge
Pros
- Requires almost no skill to build and drive
Cons
- Doesn't properly test your abilities
- Doesn't allow for creative solutions nor any sort of design process
- Boring to watch
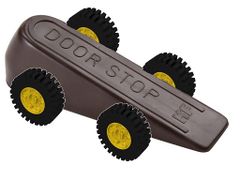
As a member of RoboJackets BattleBots, you are expected to build a robot, not a door stop with wheels. While they may be successful in competitions, they don't truly test your abilities as an engineer, so we discourage teams from building them. It's way more fulfilling to build something cool that doesn't work exactly like you hoped, than to have a fully functioning boring robot.
What is a Robot
Here I imagine a table, containing typical parts (weapon, motors, receiver), descriptions of the parts, typical weights and dimensions, and accompanying picture(s)
Design Process
Introduction
Being successful in competitions starts with the design process. While everyone wants to immediately jump into machining and get their bot done, without a proper design process the end result will be ineffective and probably nonfunctional. Additionally, without a proper CAD assembly with accompanying dimensions machining will not result in usable parts. So while it might not be as exciting as machining and assembling, it will be worth the wait in the end.
Step 0: Brainstorming
The design process begins unofficially with brainstorming. Once you know what type of bot you want to build, research notable examples of that type of bot. Look for the different types of weapons, armor, and drive systems. See what works and what doesn't. Once you've seen enough, start piecing together your ideas. Maybe do a rough sketch of the shape of the chassis, weapon, etc. Don't limit yourself to just one idea either, the more ideas you bring to your team during the first few meetings when you decide on an overall design, the better. It is worth mentioning that you will be on a team, so don't get TOO attached to one idea, as not one person on the team will end up having designed the entire bot.
Step 1: Sketch
This is when the design process will start properly. Once you're on a team the first goal is to come up with a bot design. Think broad. Focus on features. Odds are that the design you end up with by the end of the sketch face will not be what the robot you end up building will look like. As you go through the rest of the design process, you will make changes to this design. However, this doesn't mean that it's not worthwhile to come up with some rudimentary overall dimensions, such as the overall length, width, and height of the bot. These dimensions can be based loosely off of previous bots as a guideline.
Step 2: Draw
Once you've got an overall sketch of the bot, its time to start drawing some individual parts out and assign them some dimensions. This is important, as having some predetermined dimensions will make the CAD process easier. Make sure that your team is communicating during this process, as its important that everyone understands the dimensions so that any given member could make the CAD part for any given part. The more your team understands the dimensions you define, the faster and more efficient the CAD process will be.
Step 3: Picking a motor
Here's a description on how to pick a motor (math n stuff)
Step 4: CAD Parts
Here's a description about how CADing the individual parts should work (the division of labor vs team all being on the same page)
Step 5: CAD Assembly
Here's a description about how assembling the CAD parts works (things to consider regarding final CAD for design review)
Step 6: Design Review
Here's a description about the design review (what to expect)
Step 7: Revise and repeat
Here's a description about what to do after the design review
Machining
Machines and what they do
- Machine 1: Does stuff
- Machine 2: Does other stuff
- Machine 3: Profit
Rules
- Rule 1: No killing yourself
- Rule 2: Beware the spinny bit on the mill
- Rule 3: No bathing in the water jet
Tips and Tricks
- How to turn on the waterjet
- Step 1:...
- Step 2:...
- What materials to use where
- If xyz breaks, do abc
Physics and Math (Oh my!)
Here's where there will be a rehashing of the math formulas and physics properties to know
Documentation
Here's where a guide regarding documentation will be
Previous bots
Here's where links to previous bots that are good examples will be
Probably another section I'm forgetting
meme
